Let's be honest, hardwood flooring installation isn't as straightforward as it looks on YouTube. And in Chicago, where we deal with brutal winter cold, summer humidity, and everything in between, the stakes are even higher. We've seen it all over our years serving Chicago and the 60-mile radius extending North and West: beautiful hardwood ruined by preventable mistakes that cost homeowners thousands in repairs.
The good news? Most of these errors are completely avoidable once you know what to look for. Whether you're a DIY enthusiast or vetting a contractor, understanding these seven common mistakes can save you time, money, and a whole lot of frustration.
Mistake #1: Skipping Moisture Content Testing
Here's the thing about Chicago weather, it's unpredictable and hard on wood. One week we're at 80% humidity in August, the next we're running our furnaces non-stop in January with bone-dry indoor air.
The mistake: Too many installers skip moisture testing entirely. They figure if the wood looks dry and the subfloor seems fine, they're good to go. Wrong. Without proper moisture content readings, you're gambling with thousands of dollars.
The fix: Before any installation begins, both your hardwood and subfloor need moisture content testing. The wood flooring should read between 7-9% moisture content, while your subfloor should be at 10-12%. More importantly, these numbers need to be within 4 percentage points of each other (or 2 percent if you're installing planks wider than 3 inches).
Your room's relative humidity should also be between 35-50%. In Chicago homes, this often means running a dehumidifier in summer and a humidifier in winter. Check out our humidity guidelines to understand how to maintain the right environment year-round.
Mistake #2: Not Acclimating Your Hardwood
We get it, you're excited. The flooring truck just delivered your beautiful red oak, and you want it installed yesterday. But patience pays off here.
The mistake: Installing hardwood straight from delivery is asking for trouble. Wood is a living, breathing material that expands and contracts with temperature and humidity changes. When you don't give it time to adjust to your home's environment, you'll end up with gaps, cupping, or buckling within months.
The fix: Your hardwood needs at least several days (often a week or more) to acclimate to your home's conditions. But here's the catch, your home needs to be at "living conditions" first. That means:
- All windows and doors installed
- HVAC system running at normal settings
- All wet trades completed (drywall, painting, etc.)
- Flooring stored in the room where it'll be installed
This is especially critical in Chicago, where we have such dramatic seasonal swings. Don't rush this step.
Mistake #3: Cutting Corners on Subfloor Prep
If your subfloor isn't right, nothing else matters. Period.
The mistake: We've walked into homes where flooring was installed over particleboard (a big no-no), subfloors that weren't level, or surfaces covered in drywall compound blobs and construction debris. Some installers figure "it's underneath, who cares?" The answer is: your floor cares.
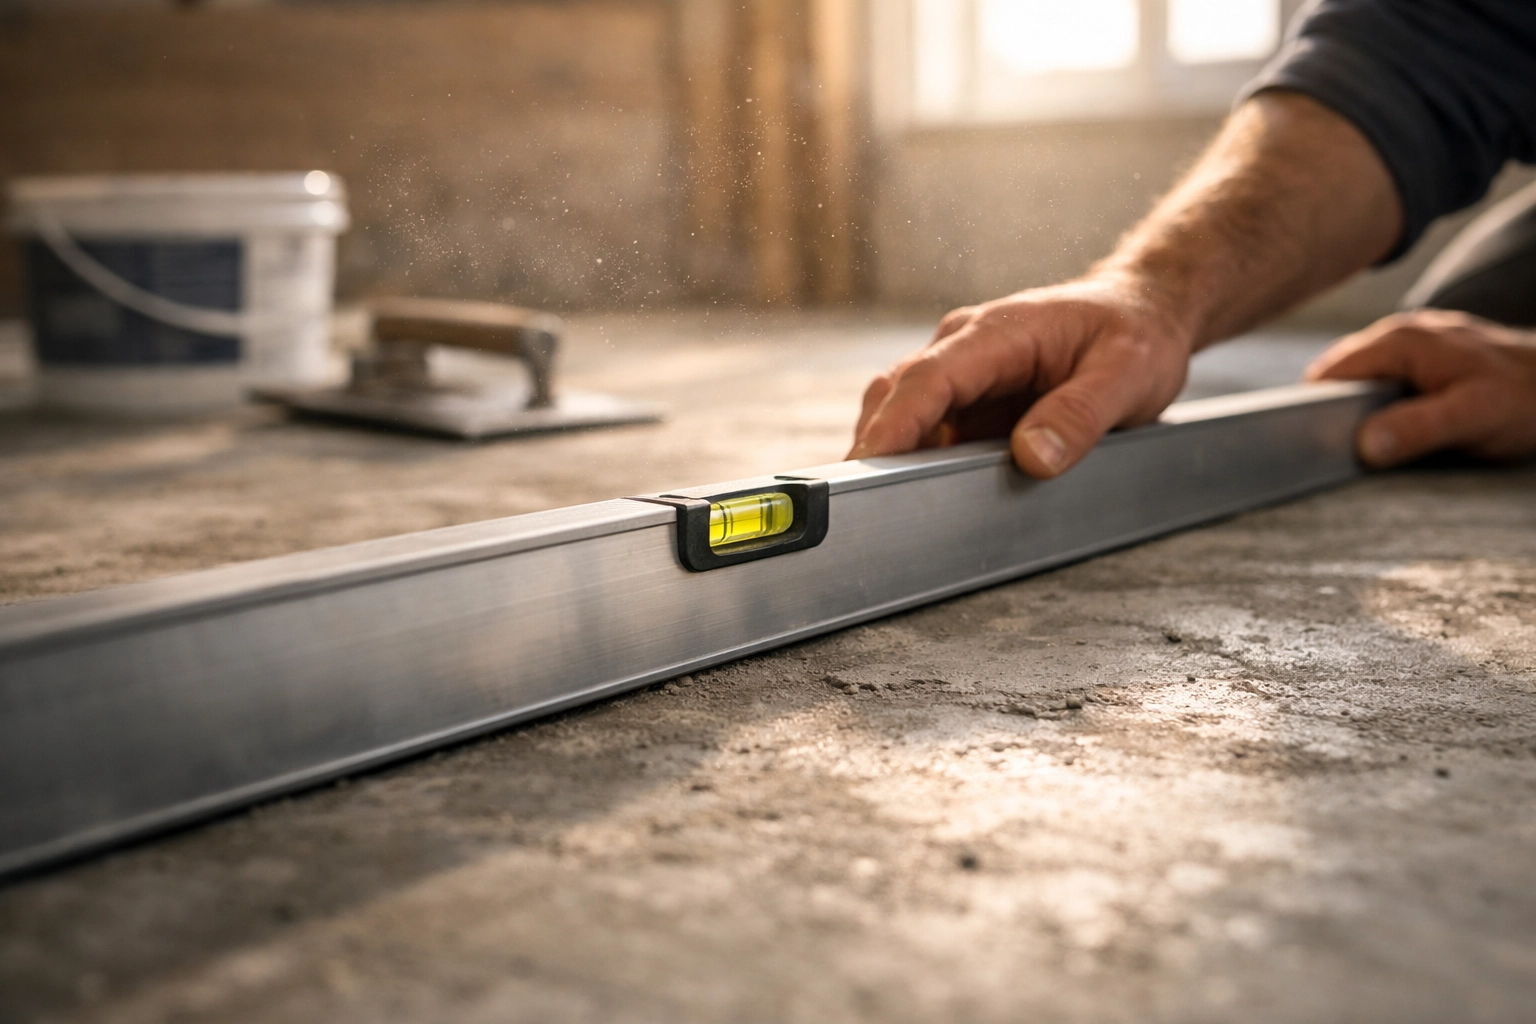
The fix: Your subfloor needs to be clean, dry, flat, and structurally appropriate. Use a level to identify high and low spots, anything more than 3/16 inch over 10 feet needs correction. Sand down high spots and fill low areas with appropriate leveling compound.
Before installation, the subfloor should be swept, vacuumed, and completely dry. If you're dealing with a concrete slab (common in Chicago basements and first floors), moisture testing is even more critical. Understanding proper subfloor preparation is fundamental to a successful installation.
Mistake #4: Forgetting About Expansion Gaps
Wood moves. In Chicago's climate, it moves a lot. Forget to account for this, and you'll end up with buckled floors.
The mistake: Installers sometimes run flooring tight against walls, cabinets, or islands, thinking baseboards will hide everything. But without proper expansion space, your floor has nowhere to go when humidity rises and the wood expands. The result? Buckling, warping, and an expensive repair job.
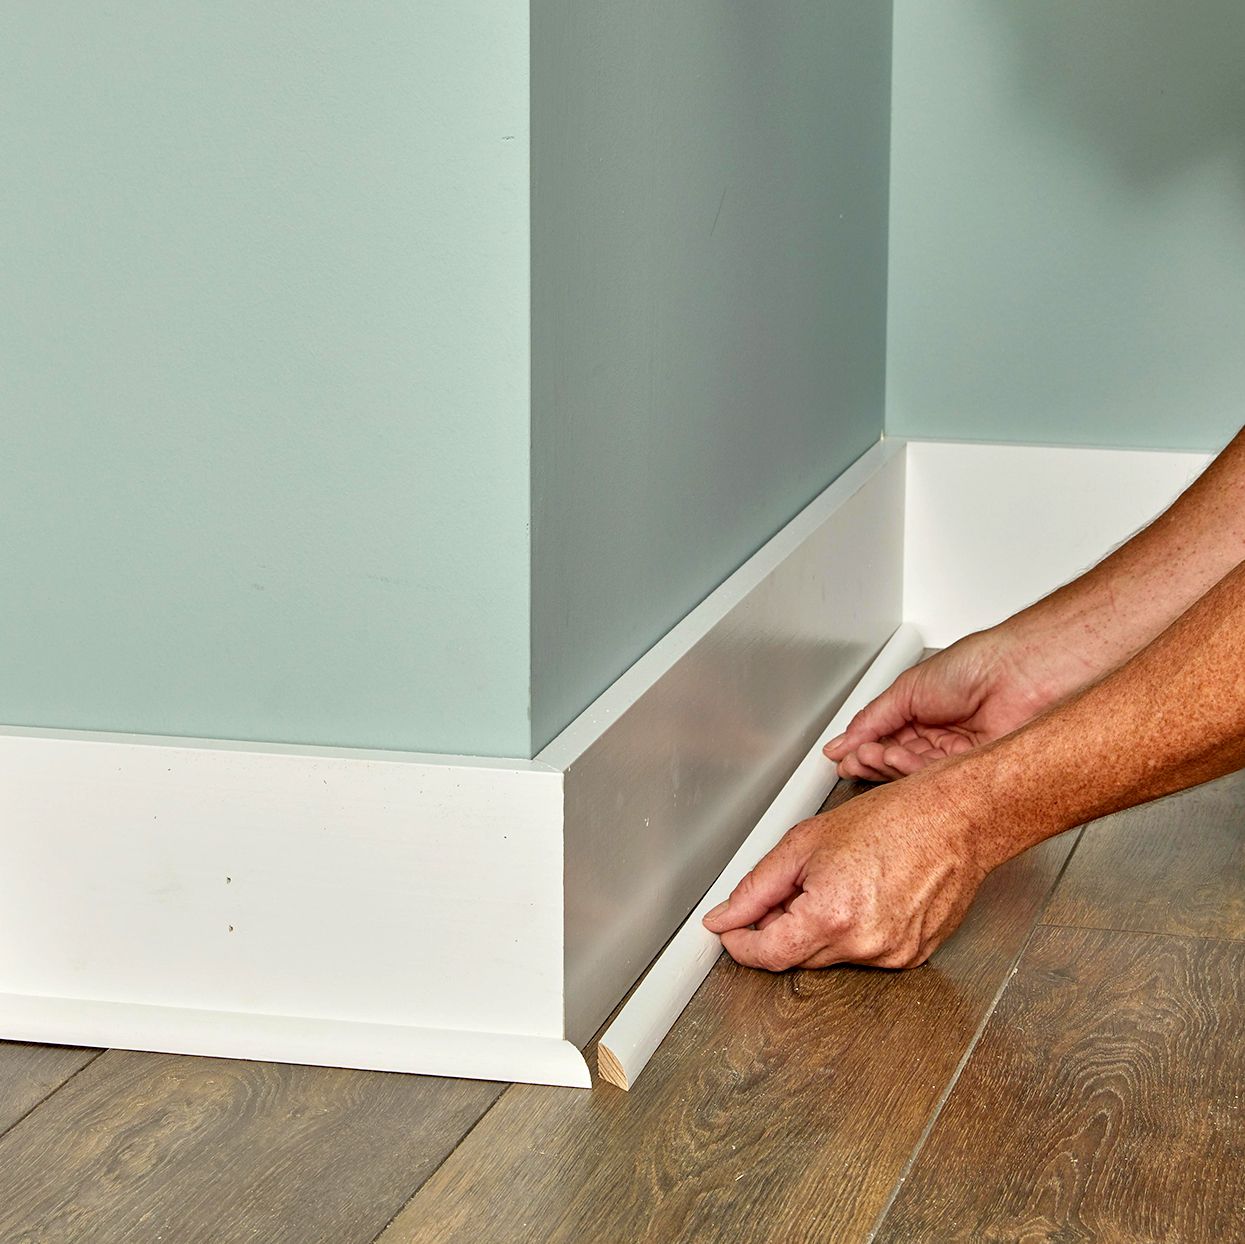
The fix: Leave a consistent 1/2 inch gap around the entire perimeter of the room and around any fixed objects like columns, islands, or hearths. Yes, it seems like a big gap, but your baseboards and quarter round will cover it completely. This breathing room is essential, especially during Chicago's humid summers when wood naturally swells.
Mistake #5: Poor Layout Planning
Ever walked into a room where the flooring just looks… off? Chances are, it's a layout problem.
The mistake: "Lazy layout" happens when installers measure off one wall and start nailing without thinking about the big picture. This leads to planks that don't run parallel to walls, awkward cuts at doorways, or board patterns that create visual chaos. We've also seen installers create H-joints (where end joints line up in adjacent rows) or "lightning bolt" patterns that scream amateur work.
The fix: Planning is everything. Before installing a single plank:
- Measure the room and plan where cuts will fall
- For large rooms, consider starting in the middle and working outward using spline
- Ensure end joints in adjacent rows are at least three times the width of the flooring apart
- Map out transitions to other rooms
- Plan around vents, doorways, and fixed objects
Take an extra hour on layout planning, and you'll save days of frustration later.
Mistake #6: Getting the First Row Wrong
The first row sets the tone for the entire installation. Get it wrong, and every subsequent row compounds the error.
The mistake: Eyeballing the first row or assuming the wall is straight (spoiler alert: walls are rarely straight). Starting off even slightly crooked means you'll battle alignment issues throughout the entire job.
The fix: Snap a chalk line parallel to your starting wall, but about 1/2 inch away (remember that expansion gap?). Use a long straight edge or laser level to verify it's truly straight. Install your first row to this chalk line, not to the wall. Check and recheck before moving to the second row.
This is where patience really pays off. Don't rush it.
Mistake #7: Inconsistent or Insufficient Fastening
This one's a big deal, and it's surprisingly common, even among supposedly professional installers.
The mistake: We've inspected jobs where installers only nailed every other board, put just a couple of nails per plank, or skipped rows entirely. Sometimes it's laziness, sometimes it's trying to save time on a bid job. Either way, it's unacceptable. Insufficient fastening leads to squeaky floors, loose boards, and premature wear.
The fix: Follow the manufacturer's fastening specifications to the letter. No shortcuts. If you're using a pneumatic nailer, make sure it's set to the correct pressure and depth: too shallow and nails pop up, too deep and you damage the wood. Every board should be fastened consistently and securely.
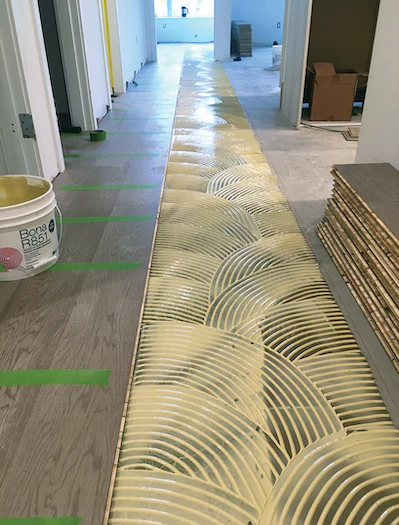
For glue-down installations (common with engineered hardwood), use the right trowel notch size and spread adhesive evenly. Don't skimp on glue to save a few bucks: it's false economy.
The Chicago Climate Factor
Here's what makes Chicago unique: our extreme seasonal changes put extra stress on hardwood floors. The temperature swings between winter and summer, combined with dramatic humidity changes, mean that proper installation technique isn't optional: it's essential.
During installation, your home should maintain consistent conditions. Temperature control and proper maintenance after installation are just as important as the installation itself.
Getting It Right the First Time
Look, hardwood flooring is a significant investment. In our service area throughout Chicago and 60 miles North and West, we've installed thousands of floors, and we've repaired plenty of botched DIY jobs and cut-rate contractor work. The common thread in failed installations? Skipping these fundamental steps.
Whether you're doing it yourself or hiring a contractor, now you know what to look for. If you're vetting installers, ask them specifically how they handle moisture testing, acclimation, and subfloor prep. A good contractor will be happy to discuss their process in detail. A bad one will get defensive or brush off your questions.
And if you're in Chicago or the surrounding areas to the North and West, we'd be happy to provide a free estimate and walk you through exactly how we'll handle your installation: no shortcuts, no surprises.
Your floors deserve to be done right the first time. Now you know how to make sure that happens.