
Hardwood floors are the soul of a Chicago home. Whether you’re living in a classic bungalow in Irving Park, a modern condo in the West Loop, or a sprawling estate in the North suburbs, nothing beats the warmth and character of real wood. But let’s be honest: wood is a living material. It breathes, it moves, and in a city like ours, where the weather goes from "tundra" to "tropical rainforest" in a matter of weeks, it’s easy to make mistakes that can ruin your investment.
At Rovin's Flooring Inc, we’ve seen it all. From buckled boards in Schaumburg to DIY sanding disasters in Evanston, we know exactly where things go wrong. If you want your floors to last a lifetime, you need to avoid these seven common pitfalls.
Here is how to spot the mistakes you’re making and, more importantly, how to fix them.
1. Ignoring the "Chicago Humidity Rollercoaster"
The absolute number one killer of hardwood floors in Chicago is moisture. Our climate is extreme. In the summer, Lake Michigan pumps humidity into the air, causing wood to expand. In the winter, our radiators and furnaces blast dry heat, sucking every drop of moisture out and causing the wood to shrink.
The Mistake: Not monitoring your home's internal climate or failing to account for moisture during installation. If you install wood that is too dry during a humid July, it will buckle and crown by August. If you don't use a humidifier in the winter, you’ll see gaps big enough to lose a credit card in.
The Fix:
- Invest in a Hygrometer: These are cheap devices that measure humidity. You want to keep your home between 35% and 55% humidity year-round.
- Use Expansion Gaps: During installation, always leave space near the walls for the wood to breathe.
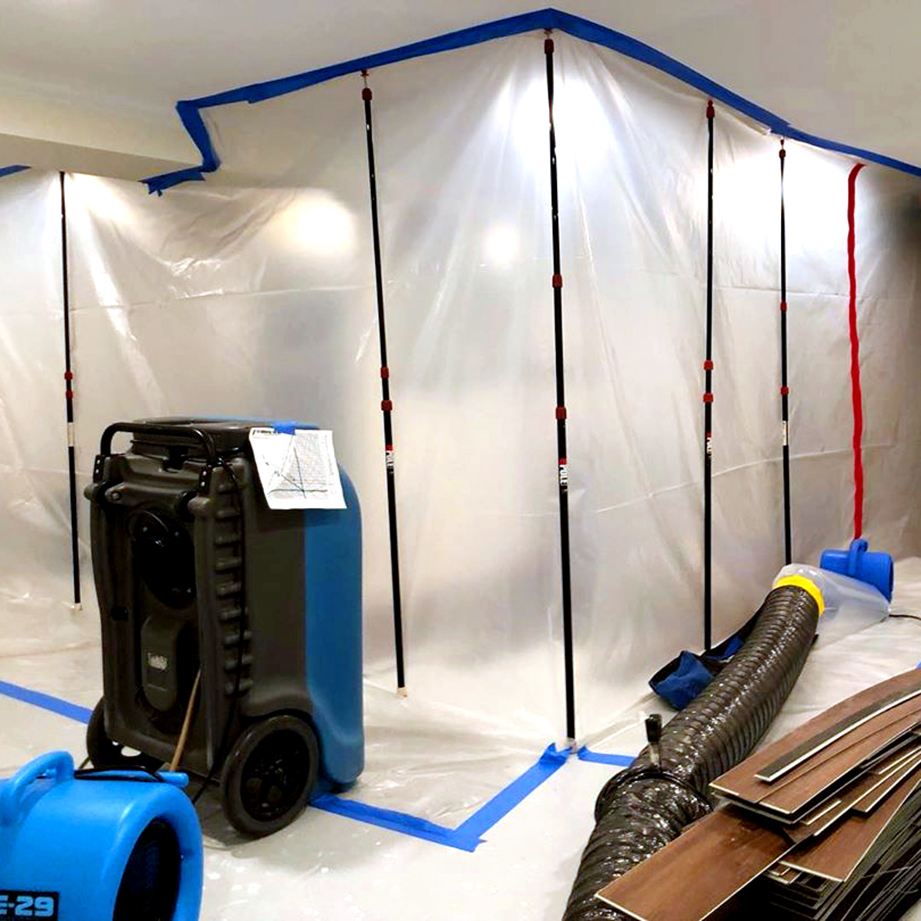
- Water Extraction: If you’ve suffered from a leak or flooding, don't wait. Professional water extraction is the only way to save the subfloor and the planks.
2. Skipping Subfloor Preparation
We get it, you’re excited to see the new Oak or Walnut down. But the floor is only as good as what’s underneath it.
The Mistake: Installing beautiful hardwood over a subfloor that is uneven, dirty, or structurally weak. If the subfloor has "hills and valleys," your new floor will squeak, bounce, or eventually crack. Many homeowners forget to scrape off old drywall mud or glue from previous renovations, which prevents the new planks from sitting flush.
The Fix:
Before a single plank is nailed down, the subfloor must be flat, clean, and dry. At Rovin's Flooring, we specialize in subfloors installation and leveling. We use long straightedges to find high spots that need sanding and low spots that need filling. If you’re doing this yourself, don't rush the "ugly" part of the job. A rock-solid subfloor is the difference between a floor that lasts 10 years and one that lasts 100.
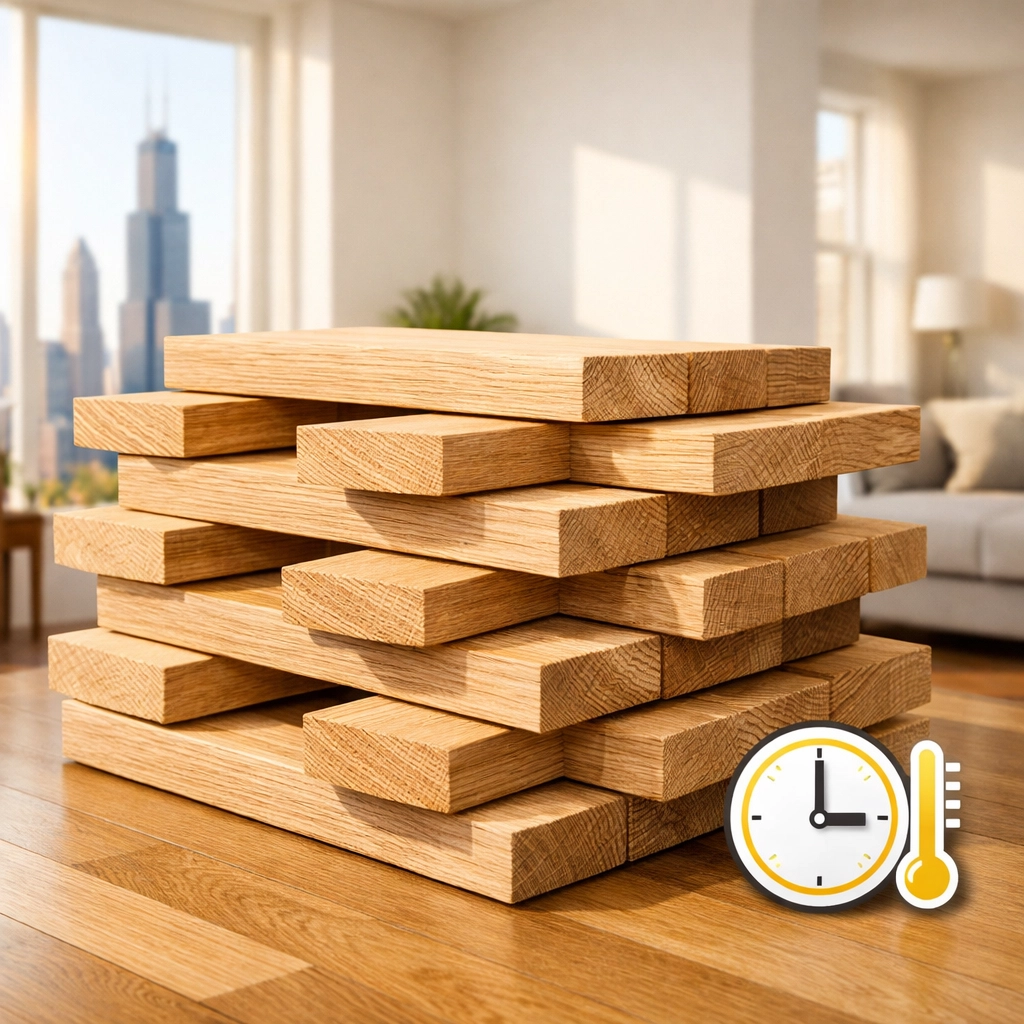
3. The "Rushed" Acclimation Period
You just bought $5,000 worth of premium hardwood material. You want it installed today. We hear you, but the wood isn't ready yet.
The Mistake: Taking wood straight from a cold delivery truck and nailing it down immediately. Wood needs to "get used to" the specific temperature and humidity of your home. If it’s delivered from a damp warehouse to a dry house, it will shrink after it’s installed, leaving you with massive gaps.
The Fix:
Patience is a virtue. Let the wood sit in the room where it will be installed for at least 48 to 72 hours (sometimes longer for exotic species). Stack the boxes in a cross-hatch pattern to allow air to circulate around them. Make sure your HVAC system is running at normal living temperatures during this time.
4. Poor Layout and "Racking"
Ever walked into a room and noticed the floor looks… "busy"? Or maybe there's a weird line of joints that all line up perfectly? That’s a racking mistake.
The Mistake: Not planning the layout. "Racking" is the process of laying out the boards before nailing them down to ensure a random, natural look. Common errors include "H-joints" (where joints line up in every other row) or "lightning bolts" (where joints step across the floor in a diagonal line). These patterns draw the eye in a bad way and can even weaken the floor's integrity.
The Fix:
- Space the Joints: Ensure the end joints of adjacent boards are at least 6 inches apart (or three times the width of the board).
- Mix the Bundles: Don't just pull from one box at a time. Open several boxes and mix the planks to distribute the natural color variations and lengths evenly across the room.
- Plan the Transitions: Think about how the wood will meet your tile or carpet in the next room before you start the first row.
5. Using the Wrong Cleaning Products
You’ve spent time and money on refinishing, and now you want to keep it shiny. But that "Orange Glow" or "Oil Soap" you found at the big-box store might be doing more harm than good.
The Mistake: Using wax-based cleaners, vinegar, or excessive water. Wax creates a buildup that makes the floor look dull over time and prevents you from being able to do a simple "screen and coat" later. Vinegar is acidic and will eat away at the finish over time. And water? Well, we already talked about how much wood hates water.
The Fix:
Stick to a professional-grade, pH-neutral cleaner designed specifically for hardwood. Use a microfiber mop that is barely damp: never "wet." If you’re unsure what to use, check our maintenance guide for a list of approved products that won't void your warranty.
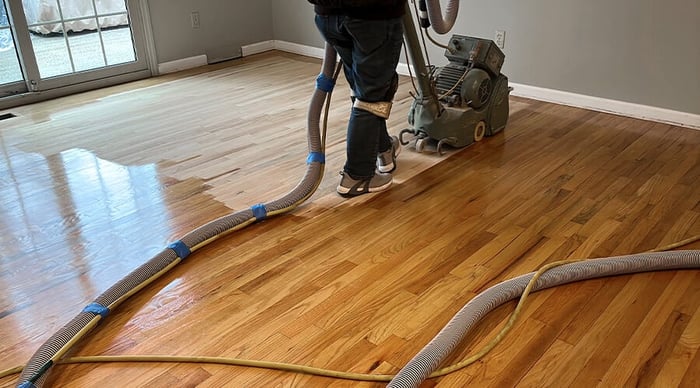
6. Overlooking the "Dustless" Advantage
If you’re living in a home while the floors are being refinished, dust is your enemy.
The Mistake: Hiring a contractor who uses outdated equipment without vacuum systems. Traditional sanding sends microscopic wood dust into your air ducts, your clothes, and your lungs. It can take months to truly get a house clean after a "dusty" sanding job.
The Fix:
Insist on dustless hardwood floor sanding. Modern industrial vacuums hook directly to the sanding machines, capturing 99% of the debris before it ever hits the air. It’s cleaner, safer, and allows for a much smoother finish because there’s no grit landing in the wet polyurethane.
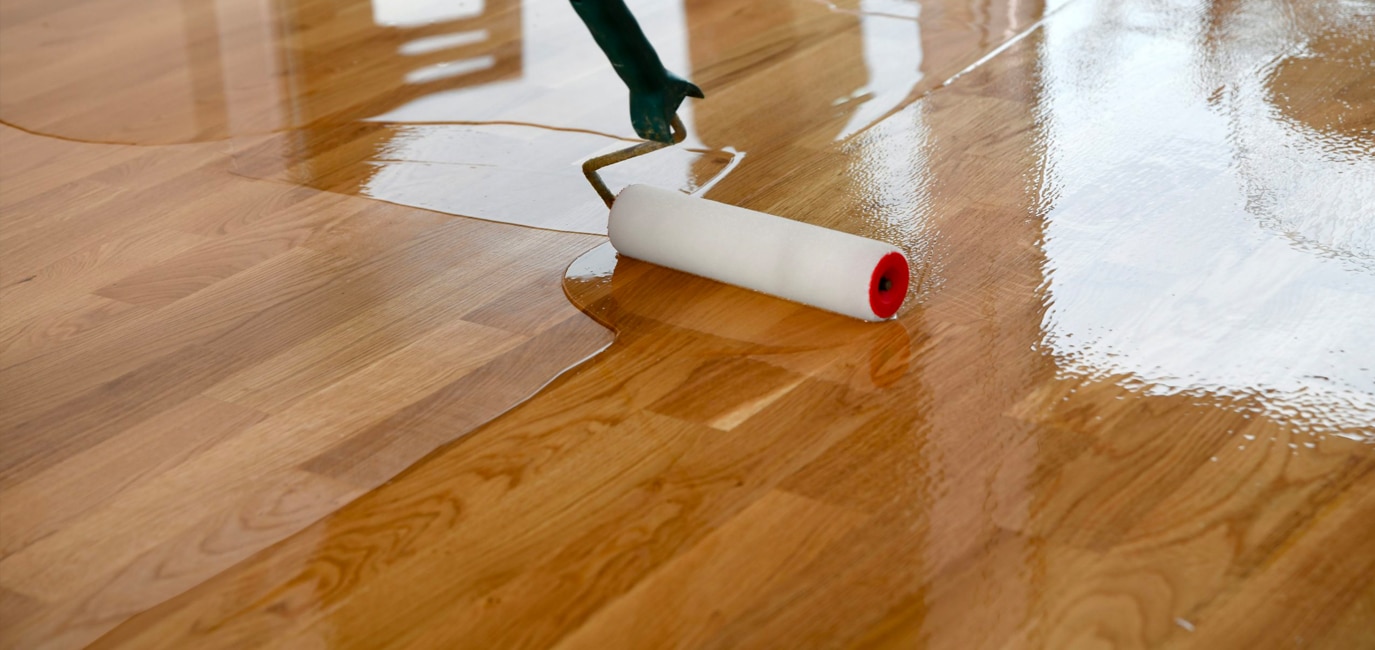
7. DIY-ing the Finish (Without a Plan)
We love a good DIY project, but hardwood finishing is an art form.
The Mistake: Choosing a stain color based on a tiny 1-inch square in a brochure, or applying finish too thick/thin. Often, homeowners don't realize that the same "Provincial" stain will look completely different on White Oak than it does on Red Oak.
The Fix:
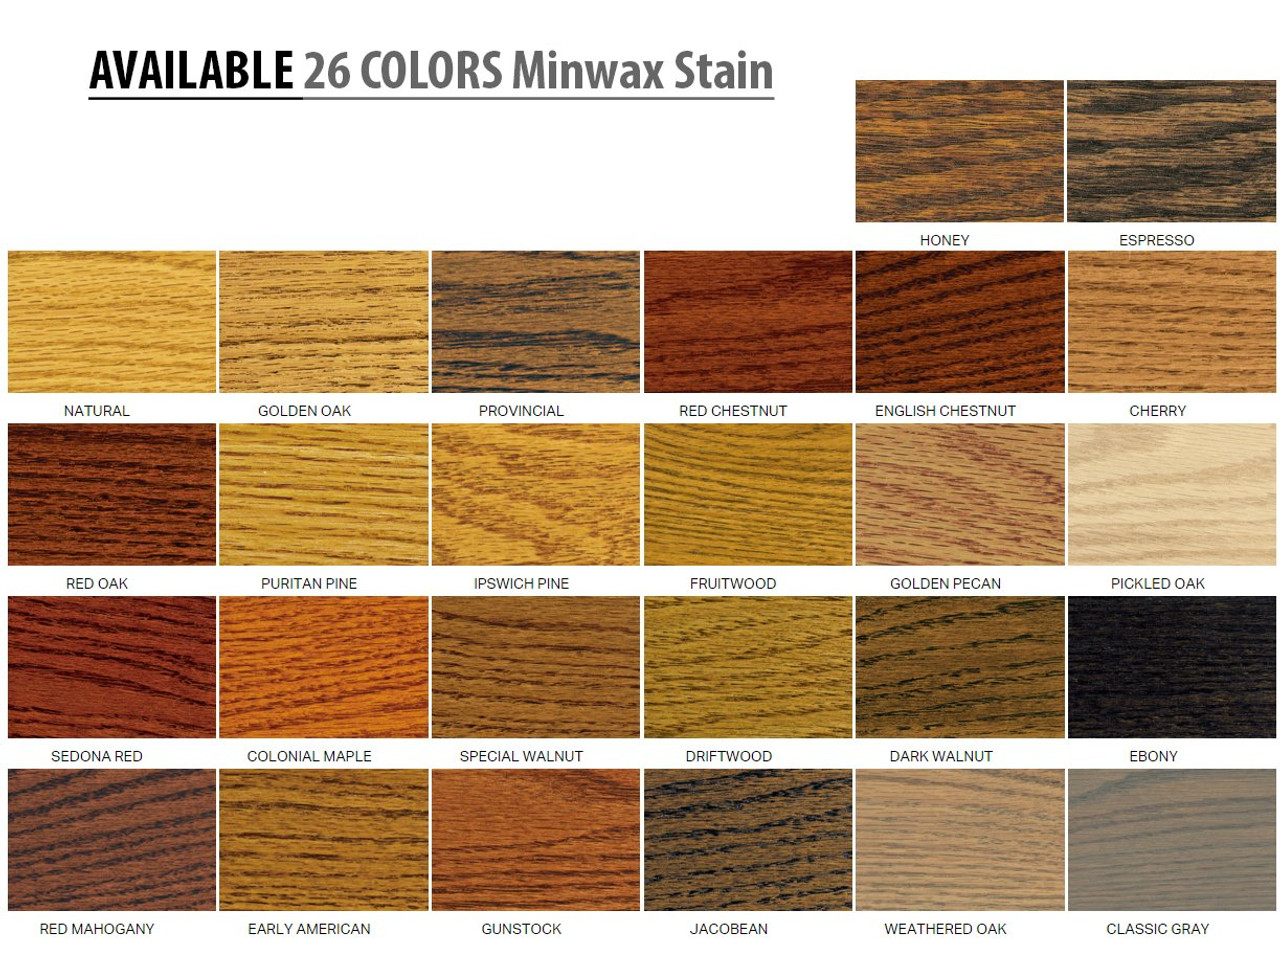
Always test stains on a scrap piece of your actual flooring or in an inconspicuous closet. If you want a specific look, check out a Minwax Stain color chart but remember that the wood’s natural undertones will play a role. Also, decide early if you want a water-based finish (fast drying, no smell, stays clear) or an oil-based finish (longer dry time, amber glow, very durable). For many Chicago homes, we recommend high-traffic commercial finishes to stand up to our slushy winters.
Why Local Expertise Matters
The challenges of wood flooring in Chicago aren't the same as they are in Arizona or Florida. You need someone who understands the local architecture and the local climate. Rovin's Flooring Inc has been serving the Chicago area and its North and West suburbs (extending 60 miles out to places like Naperville, Elgin, and Waukegan) for years.
Whether you need a commercial installation for your business or you're trying to decide between repairing or replacing your engineered hardwood, we've got the tools and the crew to do it right.
Ready for a Floor You’ll Love?
Don't let these common mistakes turn your dream floor into a nightmare. If you’re ready for a professional touch, we’re here to help. From the first estimate to the final coat of finish, we treat every home like it’s our own.
Visit our gallery to see our recent work across Chicago, or contact us today to schedule your consultation. Let's make your floors the highlight of your home!